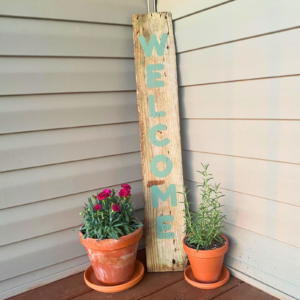
Homemade Welcome Porch Sign
Turn a scrap wood board into a beautiful homemade Welcome porch sign with leftover paint and free printable letters. This easy country-style project comes together in just a couple of hours and adds handmade charm to your porch year-round.
Equipment
- Scrap wood board
- Paint
- Free printable sign letters
- Clear protective sealer (optional)
- Paint brush or foam brush
- Printer
- Scissors
- Pencil
- Tape
- Dropcloth or cardboard
Instructions
- Protect your work surface with a drop cloth or cardboard.
- Clean the wooden board and paint the background. Allow it to dry completely.
- Apply a second coat if needed.
- Download and print the free Welcome letters from the Country Living Toolkit.
- Cut out and arrange the letters on the board.
- Tape the letters in place and trace them onto the board.
- Paint the lettering and let it dry completely.
- Seal the sign if desired and display it on your porch.
Notes
- Reclaimed wood gives the sign extra country-style character.
- Chalk paint creates a beautiful matte finish, but acrylic or exterior paint also works well.
- Customize your sign with different paint colors or sayings to fit the season or your home's style.